I wanted to make two functions with delays to assist BP scripting of logic. One for dialog and one for item interaction. The one I’ll cover here handles dialog.
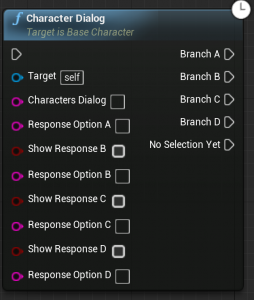
My goal: Make a function that accepts dialog parameters, waits for a user response and returns the player’s selection. (Additionally, make a breakout which flows execution based on the player’s selection.)
I couldn’t find any help online when writing this function. So I crept through engine code. Unreal has a LatentActionManager held by UWorld. You can get its reference from GetWorld->GetLatentActionManager()
Using this I made a c++ class derived from FPendingLatentAction and put our own logic in it.
Here is the BP functions header:
|
|
UFUNCTION(BlueprintCallable, Meta = (ExpandEnumAsExecs = "PlayerSelection"), Category = "Dialog", meta = (Latent, WorldContext = "WorldContextObject", LatentInfo = "LatentInfo")) void CharacterDialog(UObject* WorldContextObject, FString CharactersDialog, FString ResponseOptionA, bool ShowResponseB, FString ResponseOptionB, bool ShowResponseC, FString ResponseOptionC, bool ShowResponseD, FString ResponseOptionD, struct FLatentActionInfo LatentInfo, EActorDialogResults& PlayerSelection); |
Here is the function’s definition:
1 2 3 4 5 6 7 8 9 10 11 12 13 14 15 16 17 18 19 20 21 22 23 24 25 26 |
// //*launch dialog action, which will wait for player response*/ void ABaseCharacter::CharacterDialog(UObject* WorldContextObject, FString CharactersDialog, FString ResponseOptionA, bool ShowResponseB, FString ResponseOptionB, bool ShowResponseC, FString ResponseOptionC, bool ShowResponseD, FString ResponseOptionD, struct FLatentActionInfo LatentInfo, EActorDialogResults& PlayerSelection) { FDialogStruct Dialog = FDialogStruct(DialogPortrait, CharactersDialog, ResponseOptionA, ShowResponseB, ResponseOptionB, ShowResponseC, ResponseOptionC, ShowResponseD, ResponseOptionD); /**launch dialog delay action, which will wait for player response to dialog*/ if (UWorld* World = GEngine->GetWorldFromContextObjectChecked(WorldContextObject)) { FLatentActionManager& LatentActionManager = World->GetLatentActionManager(); if (LatentActionManager.FindExistingAction<FDialogDelayAction>(LatentInfo.CallbackTarget, LatentInfo.UUID) == NULL) { LatentActionManager.AddNewAction(LatentInfo.CallbackTarget, LatentInfo.UUID, new FDialogDelayAction(Dialog, TempReferenceIComponentRequestingDialog, NULL, LatentInfo, PlayerSelection)); } } } |
What happens above, we grab the LatentActionManager and make sure it currently isn’t running a task for this object and pass it our custom latent task, along with our custom latent tasks construction params. InteractionInfo is a custom struct with the players choices, and PlayerSelection is an enum of the possible responses the player can have.
Let’s look at my custom FPendingLatentAction derived class:
1 2 3 4 5 6 7 8 9 10 11 12 13 14 15 16 17 18 19 20 21 22 23 24 25 26 27 28 29 30 31 |
#include "UObject/WeakObjectPtr.h" #include "Engine/LatentActionManager.h" #include "LatentActions.h" #include "DialogContainer.h" #include "ActorDialogComponent.h" // Based off FDelayAction // Sends dialog to passed in ActorDialogComponent classes delegate to begin dialog //waits for a response class FDialogDelayAction : public FPendingLatentAction { public: FDialogStruct DialogToProcess; FName ExecutionFunction; int32 OutputLink; FWeakObjectPtr CallbackTarget; UActorDialogComponent* DialogComponentCallback; class UBusterInteractionComponent* IComponentCallback; int32 Count = 0; EActorDialogResults* DialogResults = nullptr; /** * @param DialogComponent - Pointer to DialogComponent that called this function. * @param LatentInfo - latent info for callback */ FDialogDelayAction(const FDialogStruct& Dialog, UBusterInteractionComponent* IComponentCalling, UActorDialogComponent* DialogComponent, const FLatentActionInfo& LatentInfo, EActorDialogResults& PlayerSelection); virtual void UpdateOperation(FLatentResponse& Response) override; void ReceivePlayerSelection(EActorDialogResults PlayerSelection); }; |
Constructor:
1 2 3 4 5 6 7 8 9 10 11 12 13 14 15 16 17 18 19 20 21 22 23 24 25 26 27 28 29 30 31 32 33 34 35 |
#include "DialogDelayAction.h" #include "BusterInteractionComponent.h" FDialogDelayAction::FDialogDelayAction(const FDialogStruct& Dialog, UBusterInteractionComponent* IComponentCalling, UActorDialogComponent* DialogComponent, const FLatentActionInfo& LatentInfo, EActorDialogResults& PlayerSelection) { DialogToProcess = Dialog; ExecutionFunction = LatentInfo.ExecutionFunction; OutputLink = LatentInfo.Linkage; CallbackTarget = LatentInfo.CallbackTarget; DialogComponentCallback = DialogComponent; DialogResults = &PlayerSelection; IComponentCallback = IComponentCalling; //initiate dialog UI b if (IComponentCallback) { *DialogResults = EActorDialogResults::NoSelectionYet; //Send dialog to BusterInteractionComponent that started process, and wait for response IComponentCallback->ReceiveRequestedDialog(Dialog, this); } else { UE_LOG(LogTemp, Warning, TEXT("ERROR W/ I COMPONENT COMPONENT POINTER IN DIALOG DELAY ACTION ")); } } void FDialogDelayAction::UpdateOperation(FLatentResponse& Response) { Response.FinishAndTriggerIf(*DialogResults != EActorDialogResults::NoSelectionYet, ExecutionFunction, OutputLink, CallbackTarget); } void FDialogDelayAction::ReceivePlayerSelection(EActorDialogResults PlayerSelection) { *DialogResults = PlayerSelection; } |
I create a callback (I send a self reference to the actor who called this function.) Once the player has selected input, I push a response to this delayed action.
|
|
void FInteractionDelayAction::ReceivePlayerSelection(EInteractionResults PlayerSelection) { *InteractionResults = PlayerSelection; } |
One could also poll from the UpdateOperation. The tick/update function notes a value has been set and completes the task.
|
|
void FInteractionDelayAction::UpdateOperation(FLatentResponse& Response) { Response.FinishAndTriggerIf(*InteractionResults != EInteractionResults::NoSelectionYet, ExecutionFunction, OutputLink, CallbackTarget); } |
If you want to break out the response use the ExpandEnumAsExecs UFunction specifier:
|
|
/*EXAMPLE BLUEPRINT INTERACTION SELECTION BREAKOUT*/ UFUNCTION(BlueprintCallable, Category = "Interactable Object", Meta = (ExpandEnumAsExecs = "OutPaths")) void BreakoutInteractionSelection(const EInteractionResults& PlayerSelection, EInteractionResults& OutPaths); |
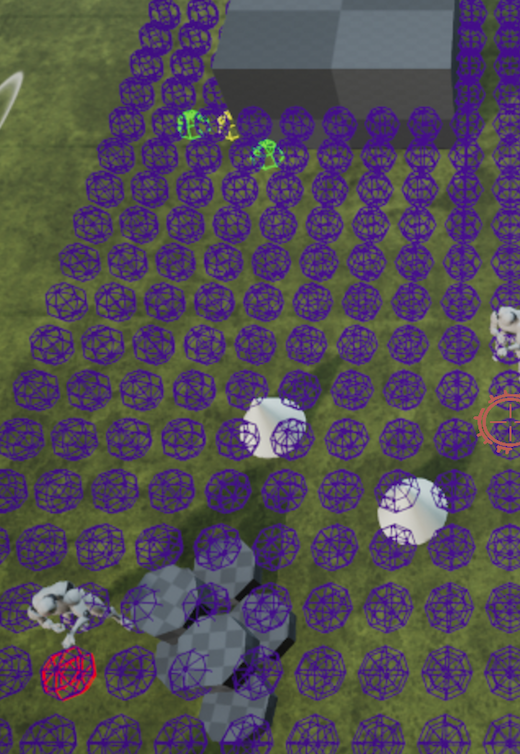
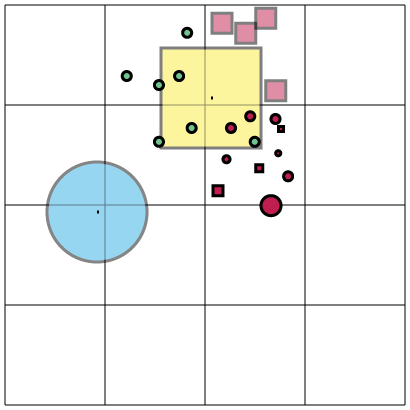
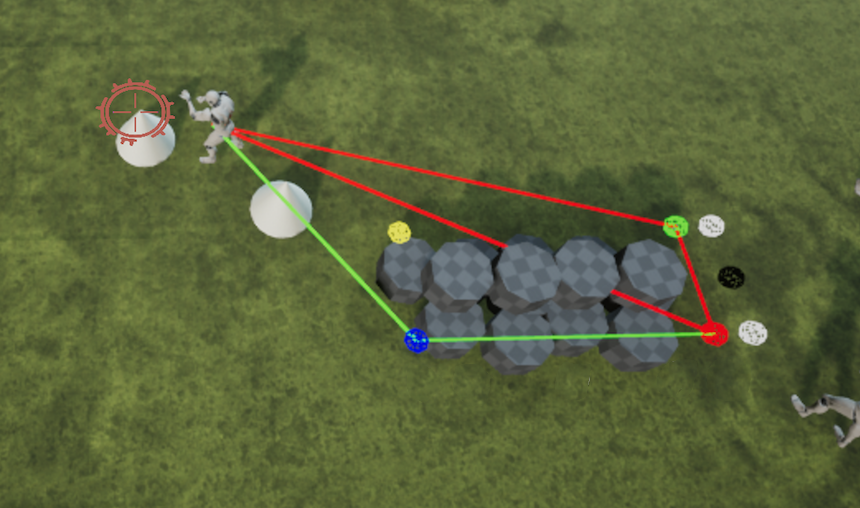
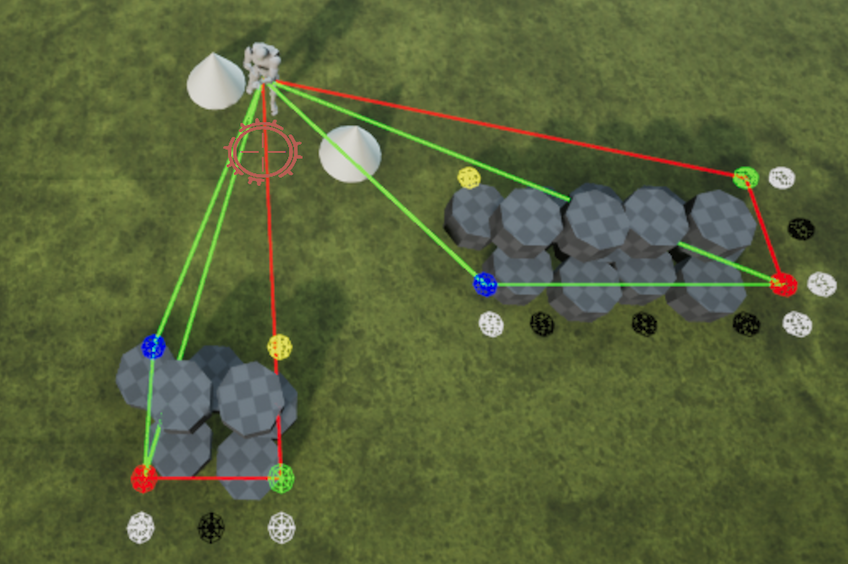
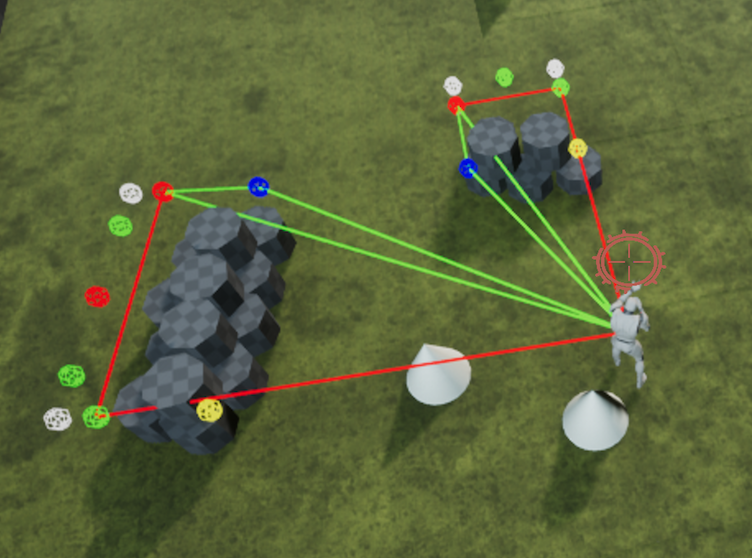
 This produced ‘okay’ results. But it presented a few problems. I’d have to implement additional checks for enemy sizes. Implement additional traces to checks if a spot was reserved/occupied. It also would miss spots (as shown by the red spheres) depending on how the checkpoints lined up. I’m also testing a lot of locations.
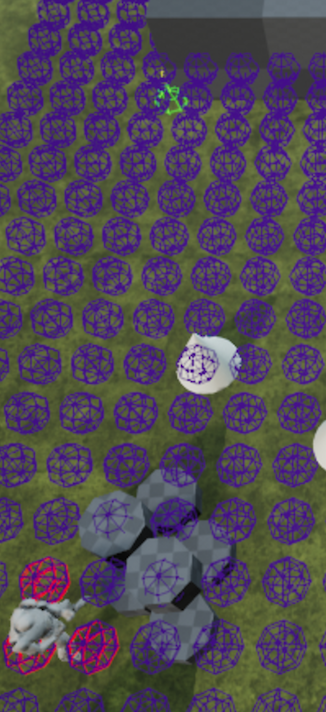
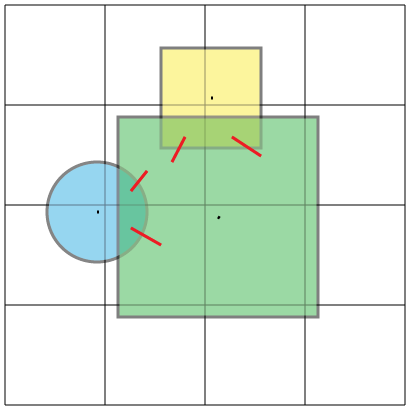
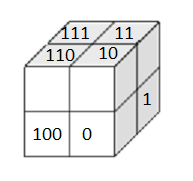
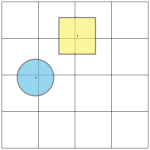 Overlap from shapes in non-adjacent cells is impossible if the cells are as large or larger than every shape tracked. If shapes end up being larger however overlap is possible and we need to track the shape in every grid cell it exists.